How to Prepare Specimens for Tensile Testing: The Complete Guide for Rubber and Plastic Labs
Tensile testing is the most fundamental mechanical test in any rubber or plastic QC lab. It tells you how strong your material is, how much it stretches, and when it breaks. But here is something that many labs overlook: the accuracy of your tensile test result depends more on specimen preparation tensile testing quality than on how expensive your UTM is.
A ₹25 lakh universal testing machine with a Class 0.5 load cell will give you wrong results if the dumbbell specimen has a burr on the gauge edge, a nick from a blunt die, or was cut from an improperly cured sheet. On the other hand, a well-prepared specimen tested on a basic UTM will give you data you can trust.
This guide walks you through the complete specimen preparation workflow for tensile testing – covering both rubber (ASTM D412, ISO 37) and rigid plastic (ASTM D638, ISO 527). By the end, you will know exactly how to go from raw material to a specimen that is ready for the UTM, with every step done right.
Why Specimen Preparation Is the Most Underrated Step in Tensile Testing
I visit QC labs across India – Thane, Pune, Chennai, Ahmedabad, Kolkata. The UTMs are calibrated. The grips are correct. The test speed is set right. But the specimens are often terrible. Uneven gauge widths. Visible nicks on the cutting edge. Flash from the mould not trimmed. Specimens tested without conditioning. And then the QC manager asks me why their results do not match the supplier’s datasheet.
The answer is almost always specimen preparation. Here is why it matters so much:
- A 0.5 mm error in gauge width changes the cross-sectional area by 8–10%, directly affecting the calculated tensile strength
- A nick or burr on the gauge edge acts as a stress concentrator – the specimen breaks there instead of in the middle, giving falsely low results
- An improperly cured rubber sheet has a different crosslink density than a properly cured one – different material, different properties
- An unconditioned specimen tested at 30°C and 70% RH (a typical Mumbai afternoon) will give different results than the same specimen tested at 23°C and 50% RH (the standard condition)
The specimen is the messenger. If the messenger is damaged, the message is wrong.
The 6-Step Specimen Preparation Workflow (Overview)
Step | What You Do | Equipment Needed |
1. Mould or source the test material | Produce a vulcanised rubber sheet or plastic plaque of correct thickness | Flat sheet mould + hydraulic press (rubber); injection moulding or compression moulding machine (plastic) |
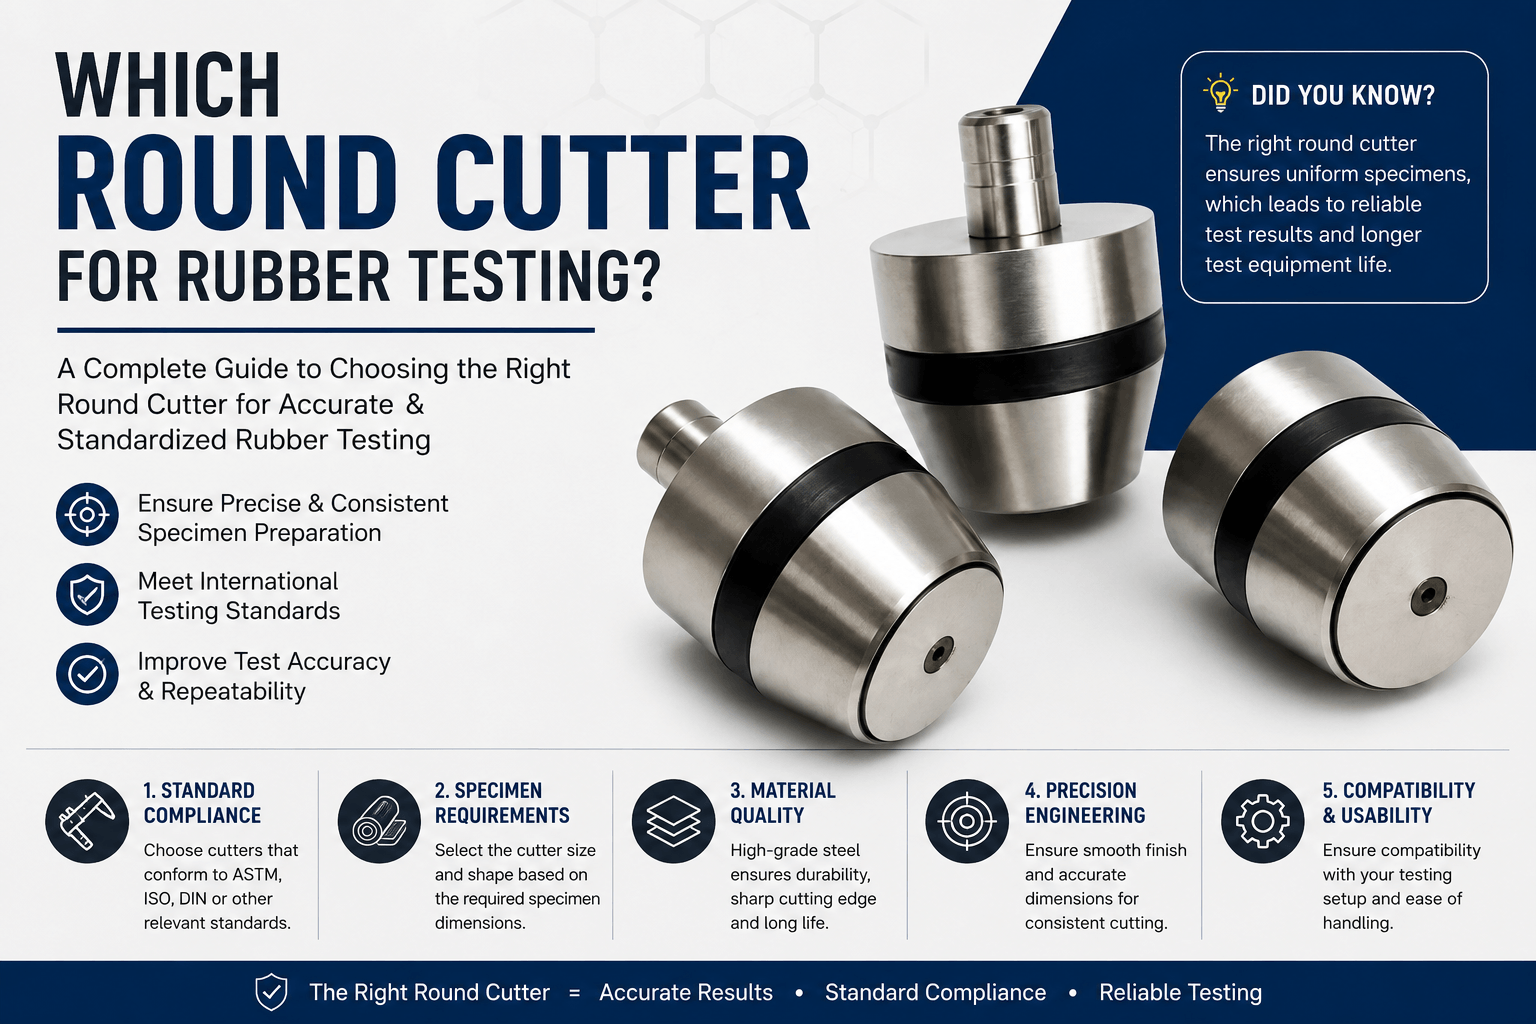
2. Choose the right cutting die | Select the die that matches your standard and material | Dumbbell cutter (Die C for rubber, Type I for plastic), or rectangular strip cutter for films |
3. Cut the specimen | Die-cut the dumbbell or strip from the sheet/plaque | Pneumatic press, hydraulic press, or manual press |
4. Measure and inspect | Verify dimensions and check for defects | Digital micrometer, magnifying glass or optical comparator |
5. Condition the specimen | Stabilise at 23°C / 50% RH for the required duration | Humidity chamber |
6. Mount and test | Load into UTM grips and run the test | UTM with roller grips (rubber) or wedge grips (plastic) |
Step 1 - Mould or Source the Test Material
For Rubber (ASTM D412, ISO 37)
For ASTM D412 specimen preparation and dumbbell specimen preparation rubber: ASTM D412 specifies that specimens should be cut from vulcanised rubber sheets prepared per ASTM D3182. This means:
- Mix the rubber compound on a two-roll mill following the standard recipe
- Place the compound into a flat sheet mould (150 × 150 mm or 200 × 200 mm cavity, 2 mm thick)
- Cure in a hydraulic press with heated platens at the specified temperature and time (typically 150°C for 10–20 minutes)
- Remove the sheet, cool, and trim flash from the edges
Critical: The sheet thickness must be uniform (2.0 ±0.2 mm for most standards). Uneven thickness means uneven cross-sectional area across specimens, which adds scatter to your results.
For Rigid Plastic (ASTM D638, ISO 527)
For ASTM D638 specimen preparation, plastic tensile specimens can be prepared by three methods:
- Die-cutting from compression-moulded plaques (ASTM D4703) – the most common method for compound QC
- Direct injection moulding into dumbbell shape – used when evaluating processing behaviour
- Machining (CNC milling or routing) from thick sheets or finished parts – for failure analysis or product testing
The standard thickness for ASTM D638 specimens is 3.2 mm (Type I). For thicker materials, the standard allows up to 14 mm with corresponding specimen types.
For Thin Films (ASTM D882)
Films under 1 mm thick do not use a dumbbell die. Instead, cut rectangular strips (25 mm wide, 200+ mm long) using a rectangular strip cutter. ASTM D882 defines the strip dimensions and test procedure for thin plastic films and sheeting.
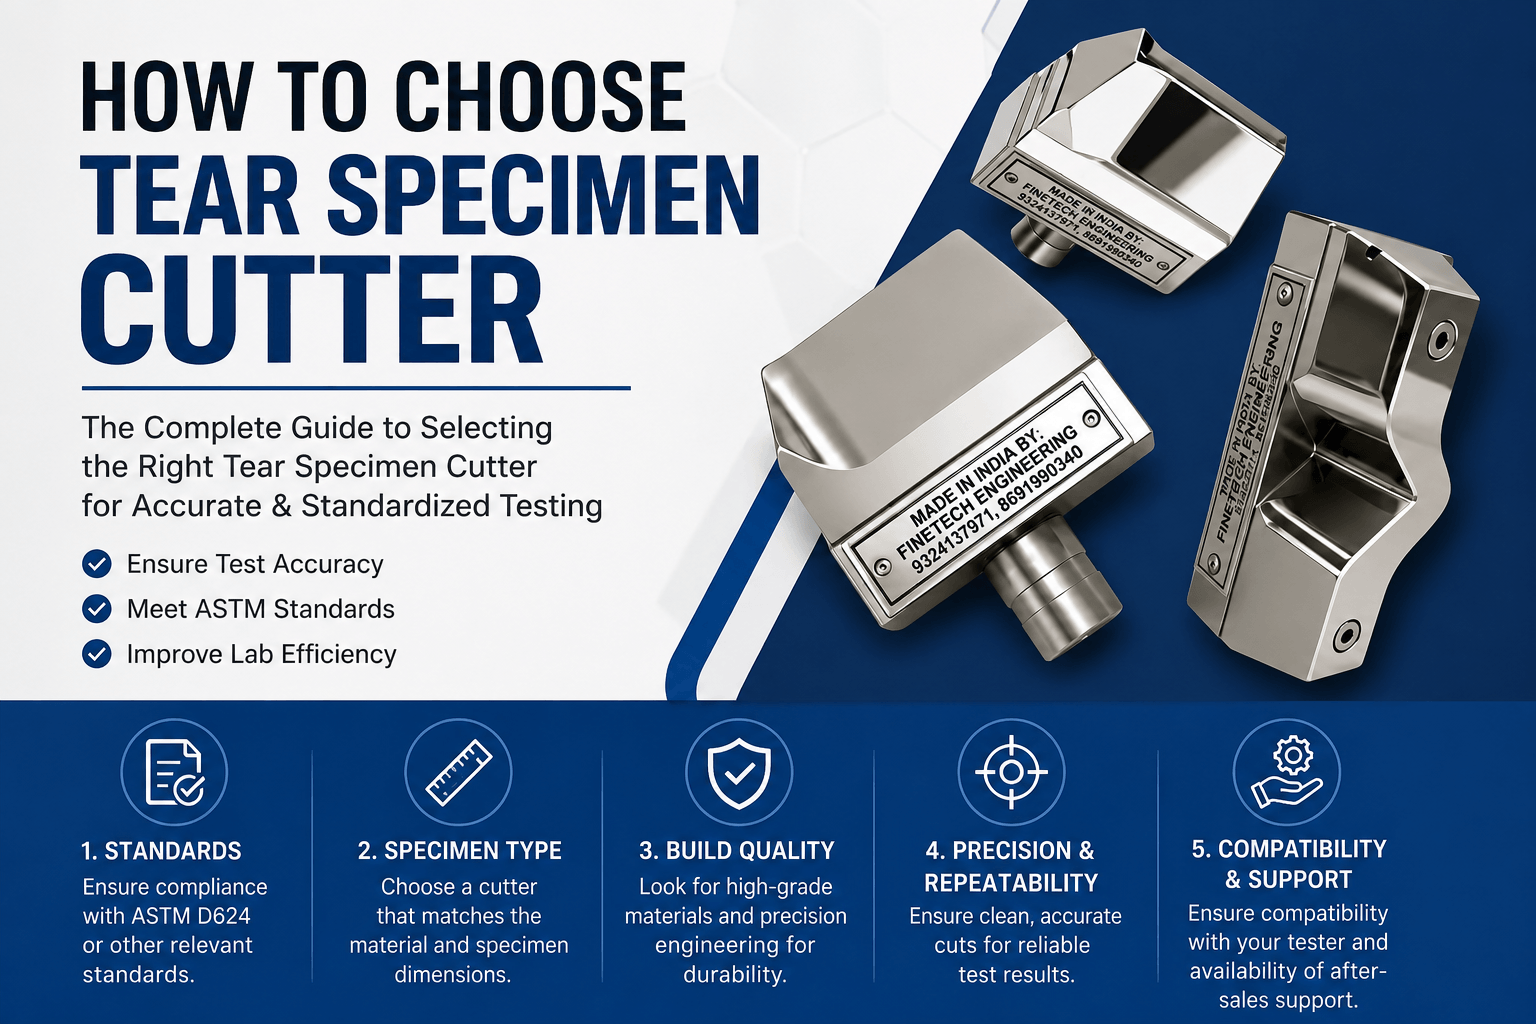
Step 2 - Choose the Right Cutting Die
Die Selection Table – Rubber and Plastic
Material | Standard | Die Type | Gauge Length | Gauge Width | Overall Length |
Vulcanised rubber | ASTM D412 | Die C (DEFAULT) | 33 mm | 6 mm | 115 mm |
Vulcanised rubber | ISO 37 | Type 2 (DEFAULT) | 25 mm | 4 mm | 75 mm |
Vulcanised rubber | IS 3400 Part 1 | Per ISO 37 Type 2 | 25 mm | 4 mm | 75 mm |
Rigid plastic (≥3.2 mm) | ASTM D638 | Type I (DEFAULT) | 50 mm | 13 mm | 165 mm |
Rigid plastic (≥3.2 mm) | ISO 527-2 | Type 1A | 50 or 75 mm | 10 mm | 170 mm |
Thin plastic film (<1 mm) | ASTM D882 | Rectangular strip | Variable | 25 mm | 200+ mm |
Thin plastic film (<1 mm) | ISO 527-3 | Rectangular strip | Variable | 25 mm | 250 mm |
Step 3 - Cut the Specimen
This cutting step is the heart of specimen preparation tensile testing: place the dumbbell cutter on the rubber or plastic sheet, centre it on the press platen, and apply force. The die shears through the material and produces a clean dumbbell-shaped specimen.
Which Press to Use
Press Type | Best For | Daily Volume |
Standard rubber and plastic sheets, fast throughput | 50–200+ specimens/day | |
Thick/hard materials, also does compression moulding | 20–80 specimens/day | |
Low volume, soft materials, teaching labs, budget setups | Under 20–30/day |
- Always use a press. Never use a mallet. A mallet produces inconsistent force, tilted cuts, and risks hand injury.
- Ensure the cutting edge contacts the material straight and flat – no tilting
- Use a cutting board (HDPE or nylon) under the material to protect the die edge and the press platen
- After cutting, gently push the specimen out of the die. If your die has an ejector mechanism, use it. If not, use a blunt plastic rod – never a screwdriver.
Step 4 - Measure and Inspect the Specimen
This step catches problems before they reach the UTM. Measure every specimen before testing.
- Measure the gauge width at 3 points along the gauge length using a digital micrometer. Record the minimum width.
- Measure the thickness at 3 points across the gauge section. Record the minimum thickness.
- Calculate the cross-sectional area: Area = minimum width × minimum thickness
- Inspect the edges visually (magnifying glass or 10× loupe): no burrs, nicks, chips, or stress whitening
- Check that the gauge edges are parallel – a die with uneven wear produces tapered specimens
- Discard any specimen with visible defects, uneven edges, or dimension outside tolerance
ASTM D412 tip: If you stack 5 broken specimens and the break point is consistently in the same location, your die is dull or nicked at that point. Replace or re-sharpen the die.
Step 5 - Condition the Specimen
Conditioning is a mandatory part of both ASTM D412 specimen preparation and ASTM D638 specimen preparation. Place the measured specimens in a humidity chamber at the standard atmosphere:
Material | Conditioning Standard | Temperature | Humidity | Minimum Duration |
Plastics | ASTM D618 Procedure A | 23°C ±2°C | 50% ±10% RH | 40 hours |
Rubber | ASTM D412, IS 3400 | 23°C ±2°C | 50% ±5% RH | 16 hours (rubber) to 40 hours (per D618) |
Films | ASTM D882 | 23°C ±2°C | 50% ±10% RH | 40 hours |
Conditioning eliminates the effect of ambient temperature and humidity variations on your results. A lab in Thane during July monsoon season (30°C, 80% RH) will get different nylon results than the same lab in December (22°C, 40% RH) – unless both test conditioned specimens.
Step 6 - Mount in the UTM and Test
The final step bridges specimen preparation tensile testing and the actual test on your universal testing machine:
- For rubber: use roller grips (self-tightening). The specimen elongates 300–800% – roller grips accommodate this without slipping.
- For rigid plastic: use wedge grips (self-tightening). The specimen has low elongation and high force – wedge grips lock tighter as force increases.
- For thin films: use roller grips or pneumatic grips with smooth or rubber-coated jaw faces.
- Centre the specimen in the grips. Misalignment introduces bending stress that skews results.
- Set the test speed: 500 mm/min for rubber (ASTM D412), 5 or 50 mm/min for rigid plastic (ASTM D638 – depends on material type)
- Run the test until failure. If the specimen breaks inside or at the grip edge (not in the gauge section), the result is invalid. Discard it.
Grip failures: If more than 2 out of 5 specimens break at the grip, the problem is either the grip type (wrong grips for the material), the jaw faces (too aggressive or too smooth), or the specimen (flash or burrs at the ends creating stress concentrations). Fix the cause, do not just run more specimens.
The 8 Most Common Specimen Preparation Mistakes (And How to Fix Them)
# | Mistake | What Goes Wrong | Fix |
1 | Using a blunt or chipped die | Burrs and nicks on gauge edges act as stress concentrators. Specimen breaks prematurely at the defect. Tensile strength reads falsely low. | Inspect the die under magnification every 500 cuts. Replace or re-sharpen when edge defects appear. |
2 | Using a mallet instead of a press | Inconsistent force and angle. Some specimens cut clean, others have partial cuts or tilted edges. | Use a pneumatic, hydraulic, or manual press. Every cut uses the same force, same angle. |
3 | Wrong die for the standard | ASTM D638 die used for rubber. ASTM D412 die used for plastic. Completely wrong specimen dimensions. | Check the standard. ASTM D412 for rubber, ASTM D638 for plastic. They are not interchangeable. |
4 | Not conditioning before testing | Results vary with ambient temperature and humidity. Lab in Mumbai during monsoon gets different values than same material in dry Ahmedabad. | Condition at 23°C / 50% RH for 40 hours (ASTM D618). Use a humidity chamber. |
5 | Not measuring specimen dimensions | Cross-sectional area unknown or assumed. Tensile strength calculation uses wrong area. Results are meaningless. | Measure width and thickness at 3 points. Use minimum values for area calculation. |
6 | Mould flash not trimmed | Flash at specimen edges creates stress concentrations. Specimen breaks at the flash line, not in the gauge. | Trim flash with a sharp blade. Better: use a mould with proper flash grooves. |
7 | Improperly cured rubber sheet | Undercured sheet: lower crosslink density, lower tensile. Overcured: brittle, lower elongation. | Follow ASTM D3182 cure recipe exactly. Calibrate press temperature. |
8 | Testing too quickly after moulding | Rubber properties change during the first 16–24 hours after vulcanisation (maturation effect). | Wait at least 16 hours after moulding before cutting and testing (ASTM D412 requirement for NR compounds). |
Rubber vs Plastic - Key Differences in Specimen Preparation
Feature | Rubber (ASTM D412 / ISO 37) | Plastic (ASTM D638 / ISO 527) |
Starting material | Vulcanised rubber sheet (moulded per ASTM D3182) | Injection-moulded plaque, compression-moulded plaque, or machined from product |
Default die | ASTM D412 Die C (115 mm, 6 mm gauge) | ASTM D638 Type I (165 mm, 13 mm gauge) |
Specimen is… | Smaller, thinner (2 mm typical) | Larger, thicker (3.2 mm typical) |
Cutting method | Die-cut from sheet using press | Die-cut from plaque or directly moulded/machined |
Grip type | Roller grips (self-tightening for high elongation) | Wedge grips (self-tightening for high force, low elongation) |
Test speed | 500 mm/min | 5 or 50 mm/min (depends on material; see standard) |
Extensometer needed? | Not required (crosshead travel is sufficient for rubber) | Recommended for modulus measurement (elastic region is small) |
Conditioning | 23°C / 50% RH, 16–40 hours | 23°C / 50% RH, 40 hours (ASTM D618) |
Key risk | Die wear (rubber is abrasive, dulls die edges faster) | Wrong specimen type (5 types exist in ASTM D638, must choose correctly) |
What Equipment Do You Need for Complete Tensile Specimen Preparation?
Equipment | Purpose | Finetech Product |
Flat sheet mould (rubber only) | Mould vulcanised rubber test sheets per ASTM D3182 | Finetech flat sheet mould (SS 304) |
Hydraulic press with heated platens | Compression moulding of test sheets and plaques | Finetech hydraulic press |
Dumbbell cutting die | Cut dumbbell specimens from sheets/plaques | Finetech dumbbell cutter (Die C, Type I, etc.) |
Rectangular strip cutter (films only) | Cut strip specimens for thin film testing per ASTM D882 | Finetech rectangular strip cutter |
Pneumatic or manual press | Drive the cutting die through the sheet | Finetech pneumatic / manual press |
Digital micrometer | Measure specimen width and thickness | Standard lab instrument |
Humidity chamber | Condition specimens at 23°C / 50% RH | Finetech humidity chamber |
UTM with grips | Perform the tensile test | Finetech UTM with roller / wedge grips |
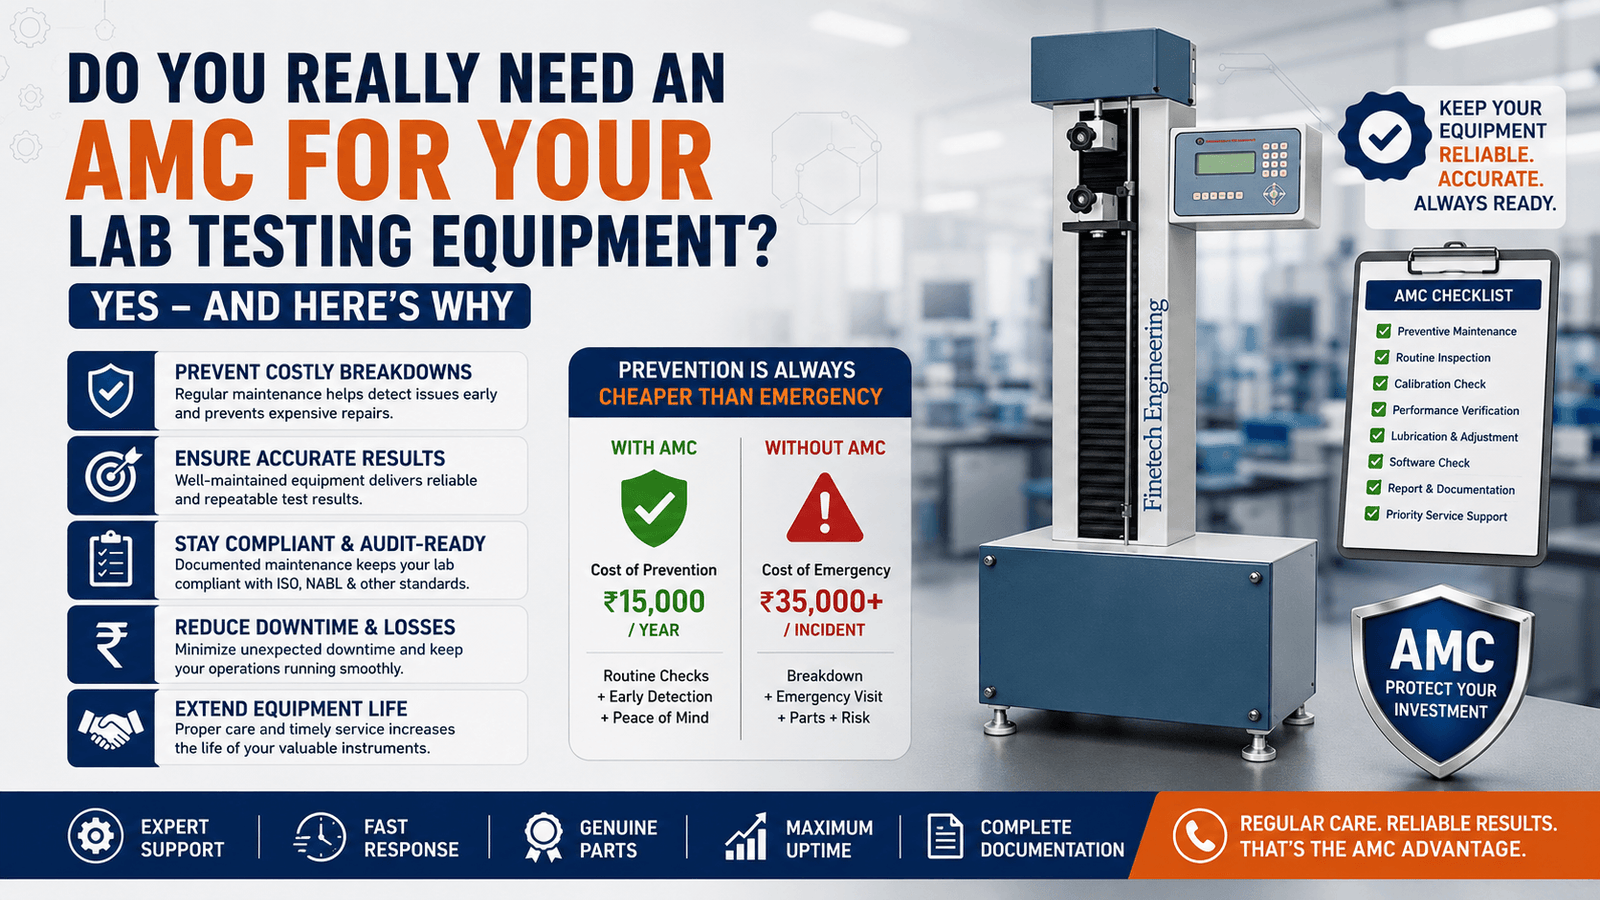
Complete tensile testing workflow from one manufacturer: mould + press + die + humidity chamber + UTM + grips. One purchase order, one calibration provider, one AMC. That is the Finetech advantage.
Frequently Asked Questions
For comprehensive transport simulation, yes. The vibration tester simulates continuous transport vibrations (settling, abrasion, fatigue). The drop tester simulates sudden handling impacts (crush, puncture, breakage). Most packaging standards (ASTM D4169, ISTA 3A) require both. Finetech manufactures both - ask for a bundled vibration testing machine price India quote for a complete vibration tester for packaging India + drop tester setup.
ASTM D999 is the international standard for vibration testing of shipping containers and packages. As an ASTM D999 vibration tester manufacturer, Finetech Engineering builds every vibration table to meet its apparatus requirements for Method A1 (sinusoidal linear vertical) - the most commonly specified method. ASTM D999 compliance is required by export customers, international retailers, and ASTM D4169 / packaging vibration tester ISTA compliant test programmes.
Final Thoughts
Specimen preparation is not glamorous. It does not have a digital display or a software interface. But it is the foundation of every tensile test result your lab produces. A well-prepared specimen gives you data you can trust – data that matches your supplier’s datasheet, satisfies your customer’s specification, and passes your NABL auditor’s review. A badly prepared specimen wastes compound, wastes time, and gives you a number that means nothing.
Follow this rubber tensile test specimen preparation step by step guide: mould the sheet, choose the right die, cut it cleanly, measure it carefully, condition it properly, then test it on your universal testing machine for tensile testing India with the right grips. Get these six steps right, and your tensile test results will be right.
Finetech Engineering manufactures every piece of equipment in this workflow: flat sheet moulds, hydraulic presses with heated platens, dumbbell cutting dies for every ASTM and ISO standard, pneumatic and manual presses, humidity chambers, and universal testing machines with matched grips. One manufacturer for the entire chain from raw compound to test result.
Need help setting up your tensile testing specimen preparation workflow? Tell us your material (rubber or plastic), your standard (ASTM D412 or D638), and your daily volume. We’ll recommend every piece of equipment you need and quote a complete package.
WhatsApp: +91 93241 37971 | Email: info@finetechengineer.com | Visit: /specimen-cutters-and-moulds/